
The Snowflake connector lets Sellforte read tables directly from your Snowflake account, so any dataset you already keep there can become a data source in your MMM. You decide which database, schema, and tables Sellforte sees, and the connector refreshes them on a daily schedule. It is the recommended way to connect Snowflake going forward. The older setup, where Sellforte fetches data from a view you prepare, stays available as a legacy option and is described in How to enable Sellforte to fetch your data from Snowflake.
Snowflake is one of Sellforte's data warehouse connectors, alongside BigQuery, Azure SQL, and Databricks.
The connector copies each selected table as it is, without reshaping it. Agree with your Sellforte contact which tables to share, and make sure they follow the Sellforte data specifications described in Data Sources Specifications.
What you need before connecting
To set the connector up, have the following ready in your Snowflake environment. You need an account identifier for the Snowflake account Sellforte should read from, written in Snowflake's standard account-locator or org-account form. You also need a user that Sellforte signs in as, ideally a dedicated service user rather than a personal login, with access to the warehouse, database, schema, and tables you plan to share.
For authentication, you can give Sellforte either a password for that user or an RSA 2048 key-pair private key in PEM format. If you choose key-pair authentication, the matching public key must already be registered on the Snowflake user.
Decide which warehouse Sellforte should use for running its queries, and which database and schema hold the tables you want to share. The connector also accepts an optional role that scopes what the user can see. Sellforte assumes that role when running queries. If you leave the role field empty, the user's default role is used.
The role typically needs USAGE on the warehouse, USAGE on the database and schema, and SELECT on every table or view you plan to sync.
If your Snowflake account restricts network access, you will also need to allow the Sellforte integration address in your network policy. The connector setup shows you the exact address to allow.
Creating the connector
In the left-side navigation pane in Sellforte, select Connectors under Data and start a new Snowflake connection. The first dialog shows the address to allow if your data warehouse has IP restrictions. Add it to your Snowflake network policy, then press Create to continue.
Sellforte opens a secure connection form in a new browser tab. The form is one-time and expires 30 minutes after you open it, so fill it in during the same session.
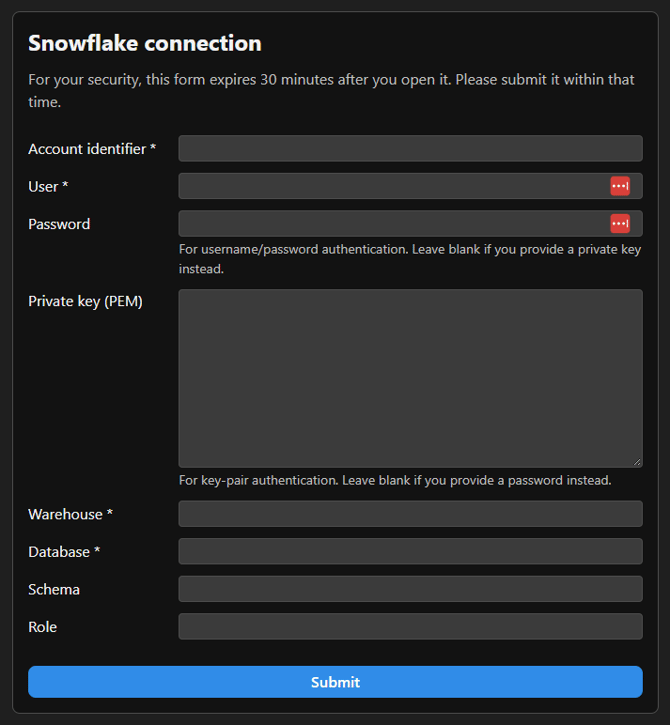
Fill in the account identifier, user, warehouse, and database. Schema and role are optional and let you narrow the default scope the connector uses. Provide either the password or the private key, not both. Press Submit when the form is complete.
Selecting tables to sync
Once the connector is live, a table editor opens from the table button on the connector card. Only the tables you choose are copied to Sellforte. A table that has a date column syncs windowed, so only the rows in the current fetch window are rewritten. A table without a date column is fully overwritten on every run.
How the sync behaves
A new Snowflake connector starts with a preview that fetches only the current month and the two months before it. The historical backfill runs month by month and resumes if interrupted. A daily sync then keeps the data up to date.
Troubleshooting
If the connection form rejects your credentials, double-check the account identifier and confirm that the user is active. For key-pair authentication, make sure you paste the full PEM block, including the header and footer lines.
If the connection succeeds but no data arrives, confirm that the role has USAGE on the warehouse, database, and schema and SELECT on the tables you want to share, and that the warehouse is not suspended.
If the connector stops syncing, for example after a password change or key rotation, contact your Sellforte contact and we will help you restore the connection.