
A media plan is your own booked weekly spend, uploaded into Sellforte and saved so that a Media optimizer scenario can start from what you have actually planned instead of from a past reference period.
Media plans sit under Planning, next to Media optimizer and Response curves, and are available wherever Media optimizer is in use.
Why media plans exist
Planners usually arrive with a plan already built, and the questions are what that plan will deliver and how it could be better. Before media plans, the way to answer them was to recreate the plan by hand as a reference scenario, as described in Media Optimizer Use Cases. With a media plan imported, the optimizer forecasts the plan exactly as booked and lets you compare optimized alternatives against it.
What a plan contains
A plan is a spreadsheet with one row per week for each combination of the dimensions your optimizer uses, such as channel, market or brand, and one spend figure per row. Once saved, it appears in the Media plans library with a name, a description and a visibility setting, and it can be the basis of any number of Media optimizer scenarios. A plan can also be the basis of the template scenarios on Home, so the business as usual forecast there reflects your real plan.
Import a plan
-
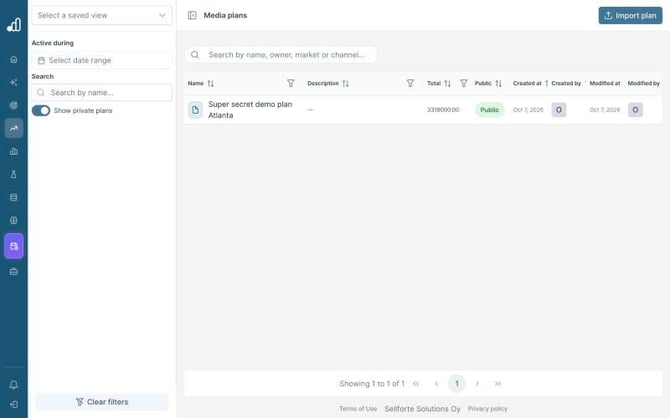
Open the import. Go to Planning > Media plans and click Import plan.
-
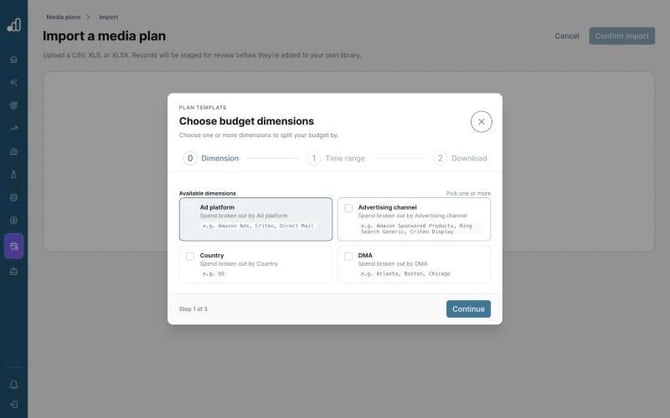
Choose dimensions. Click Download sample template to open a short wizard, and choose the dimensions to split the budget by. Pick the level you actually plan at, because finer splits used by the optimizer are handled later in the import.
-
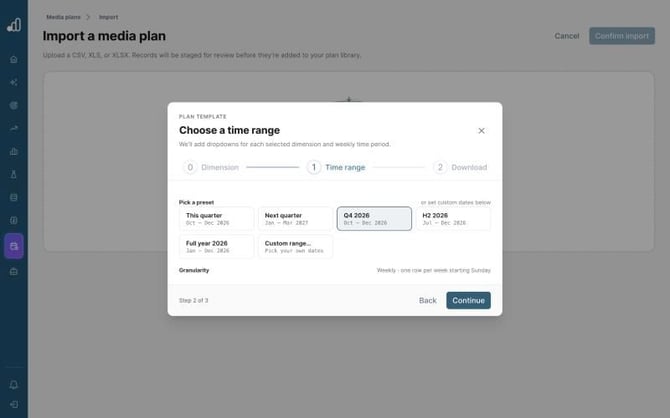
Choose a time range and download the template. Choose this quarter, next quarter, a named quarter, H2, full year or a custom range, then choose a blank template or one with example rows and click Download template. The template has one row per week, starting on your account's week start day, and carries your own dimension values as dropdowns.
-
Fill in the plan. Enter one spend figure per row and drop the file back on the import screen. The xlsx template is the most reliable format because numbers and dates stay as real values, although CSV and XLS files are also accepted. If your plan is monthly or by campaign flight, spread each month or flight across its weeks first.
-
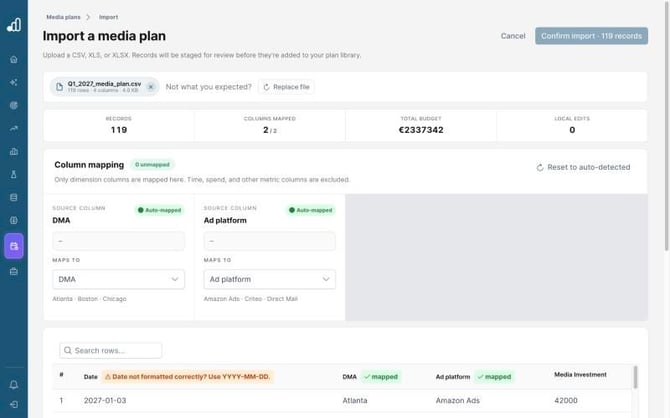
Check the column mapping. Columns are matched to dimensions automatically and marked Auto mapped. Adjust anything ambiguous with the Maps to dropdown. The summary strip shows records, mapped columns and total budget, so compare the total with your own plan at this point.
-
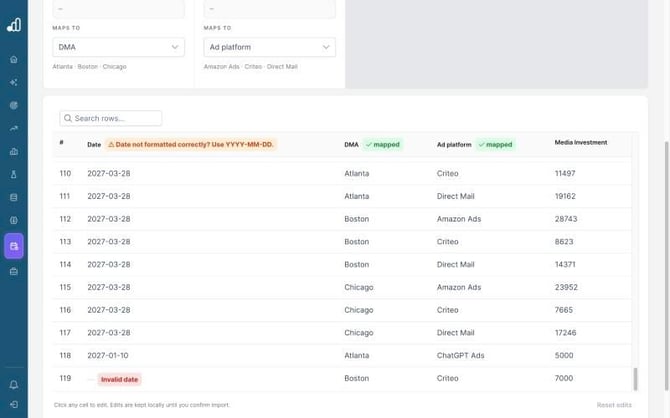
Fix invalid cells. Cells with a problem, such as a missing date, are highlighted and can be edited directly. Confirm import becomes available once every row is valid.
-
Review the plan. The review screen shows line items, total budget, channels, markets and spend over time, with rows split into valid and invalid. A row whose channel is not part of your optimizer model is marked Invalid and can be removed one by one or with Remove all invalid rows. Where one plan line covers several optimizer channels, for example a single Meta line in a model that splits Meta by country, the line is split in proportion to the previous year's spend in the same weeks, or evenly where there is no history. The split is shown before saving and can be adjusted at this step.
-
Save. Click Save plan. The plan appears in the Media plans library.
Use a plan in Media optimizer
-
Go to Planning > Media optimizer and create a new scenario.
-
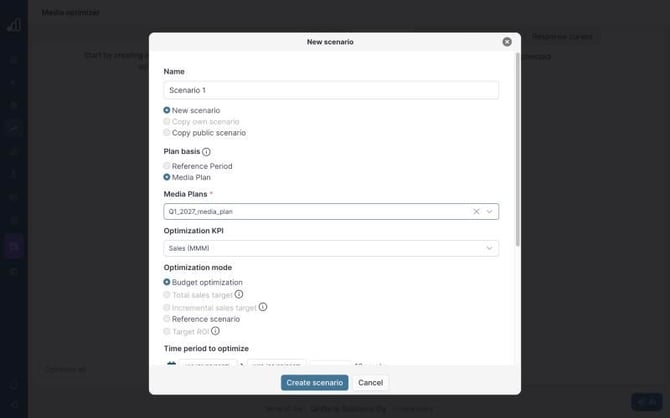
Set Plan basis to Media Plan and pick one or more plans.
-
Check the optimization period. It fills in from the plan's start and end dates and stays editable.
The plan's weekly spend becomes the starting investment and its total becomes the scenario budget, and the optimizer then reallocates that budget between weeks and channels from this starting point. When several plans are selected, spend in overlapping weeks is added together. Scenarios on a plan basis run in Budget optimization or Reference scenario mode. A practical pattern is to keep one reference scenario as booked and compare optimized versions against it. For the general scenario setup, see How to Open and Create Media Optimizer Scenarios.
Use a plan on Home
Admins can make Home forecast from a media plan instead of a reference period.
-
Go to Settings > Home template scenarios.
-
Set Scenario basis to Media plan.
The template scenario then takes its investments from the plan for the weeks after your latest modeled data, up to the plan's end date. Weeks that already have actuals are not part of the forecast.
Manage saved plans
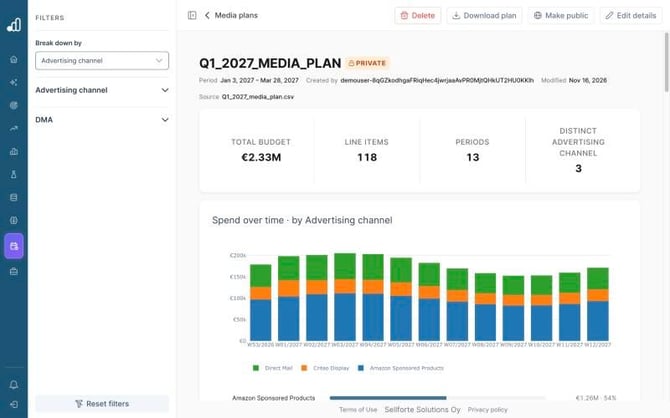
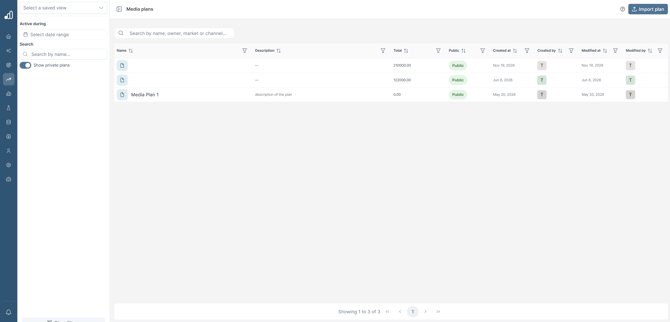
The Media plans library lists every plan with its total, visibility, creator and dates. You can search by name, owner, market or channel, filter with Active during, and toggle Show private plans. Opening a plan shows a dashboard with total budget, line items, periods, channels and spend over time by any dimension. From the top bar you can use Download plan (Excel or CSV), Edit details (name and description), Make public or Delete.
Mark plans that your team will build scenarios on as public so colleagues can find them. The plan's owner and admins can make changes, and other users see public plans read only. The figures in a saved plan stay as imported, so when the budget changes, import the revised plan as a new one and delete the previous version.
Data requirements
Media plans use your existing Media optimizer setup, so no new connector or data delivery is needed. The only input is the plan itself at weekly granularity, with dates on your account's week start day. Each channel in the plan needs to exist in your optimizer model to be included in the saved plan.