
Prerequisities
To connect Braze to Sellforte, you need a Braze account with admin privileges and the ability to create a REST API key.
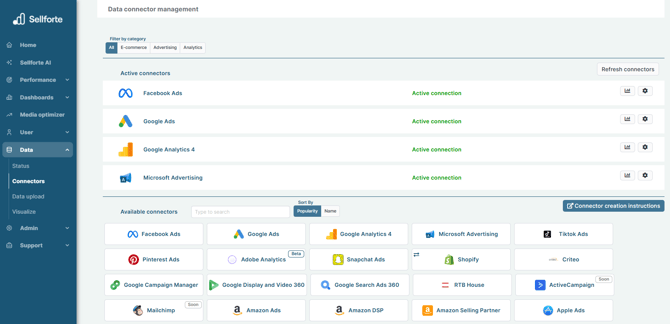
1. Log in to Sellforte and navigate to Connectors
- In the left-side navigation pane, select Connectors under Data.
-
From the Available connectors list, click the card for the relevant connector to start the connection.
2. Find your Braze API URL
Log in to your Braze dashboard at https://dashboard.braze.com or your designated dashboard URL. Your API URL depends on the dashboard URL you use. See Braze’s endpoints documentation for the complete list and make a note of the API URL that matches your dashboard. You will need it in Step 4.
3. Create an API key in Braze
In the bottom left corner of your Braze dashboard, click Developer Console. Follow Braze’s API key guide to create a new REST API key for Fivetran, and enable the following permissions:
users.export.ids
users.export.segment
email.unsubscribe
email.hard_bounces
messages.schedule_broadcasts
campaigns.list
campaigns.details
campaigns.data_series
canvas.list
canvas.details
segments.list
segments.details
purchases.product_list
events.list
feed.list
feed.details
templates.email.info
templates.email.list
subscription.status.get
subscription.groups.get
Make a note of the API key. You will need it in the next step.
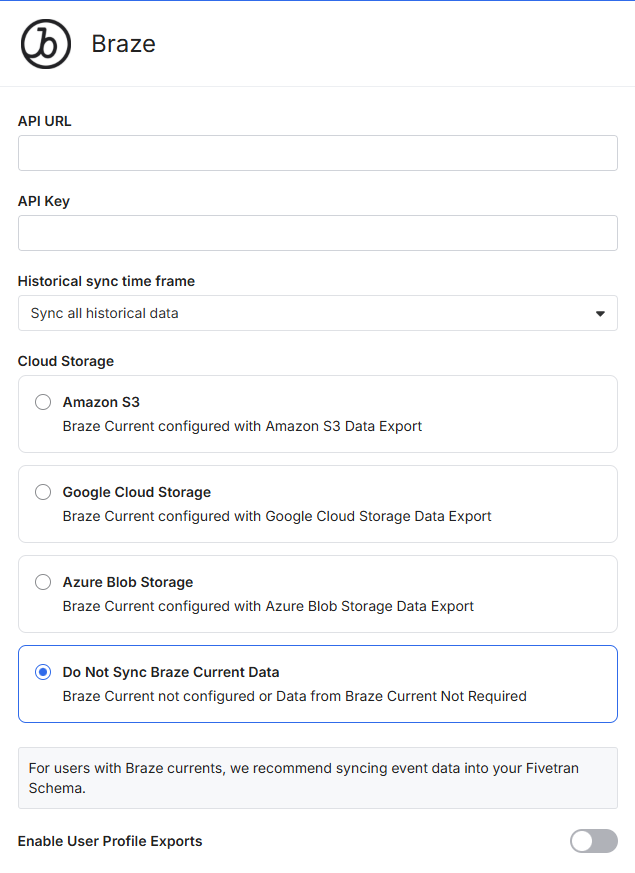
5. Enter API URL, API key and skip Braze Currents
In the connection setup form, enter the API URL and API Key you noted in Steps 3 and 4.
Keep Historical sync time fram as Sync all historical data.
In the Cloud Storage field, select Do Not Sync Braze Current Data.
In the Enable User Profile Exports, leave the toggle untoggled.
6. Click “Save & Test” and you are forwarded back to Sellforte
You are ready! 🎉
Braze is connected and data is fetched automatically with correct schema to Sellforte.