You can connect Amazon Selling Partner or Vendor Partner accounts by using the Amazon Selling Partner connector.
Prerequisites
To connect your Amazon Selling Partner account to Fivetran, you need an active Amazon Seller Central or Vendor Central account with Admin access.
Recommendations
-
Create the connection using your browser's incognito mode.
-
Create only one connection per Amazon Selling Partner account.
-
Create only one connection for all marketplaces in the same region. The Amazon Selling Partner API (SP-API) authorizes the connection for a specific region and provides us access to all marketplaces in this region. For more information about marketplaces and regions, see the Amazon SP-API documentation.
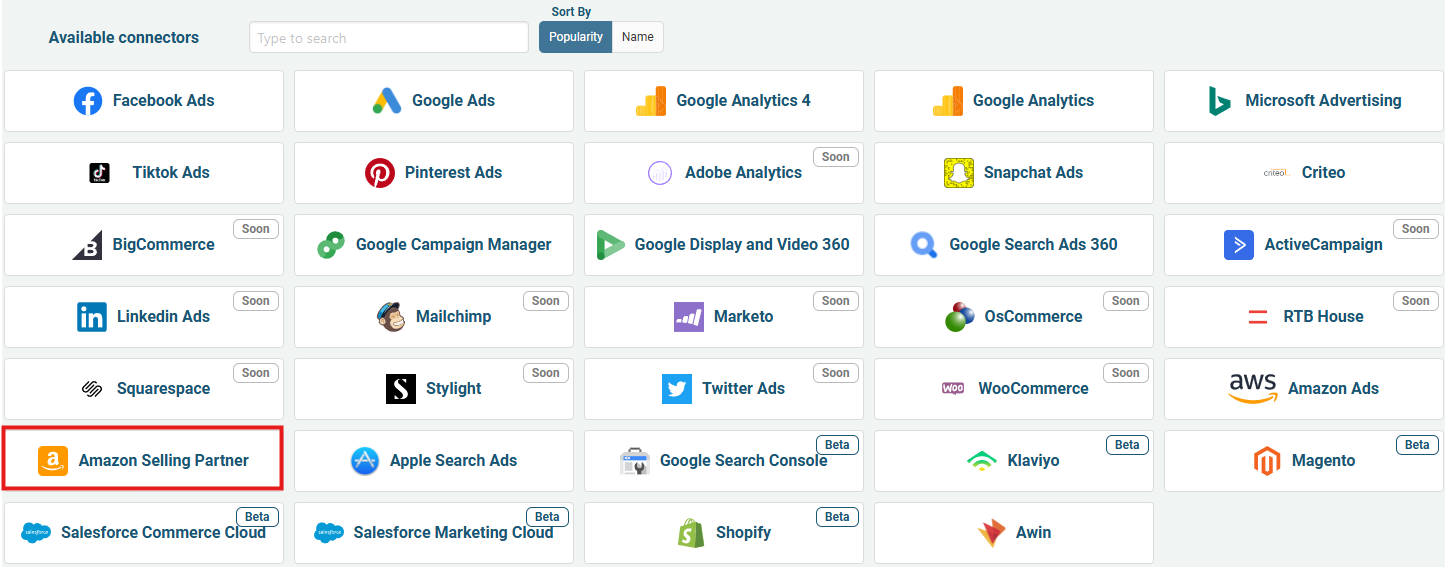
1. Log in to Sellforte and navigate to Connectors
- In the left-side navigation pane, select Connectors under Data.
-
From the Available connectors list, click the card for the relevant connector to start the connection.

2. Choose Amazon Selling Partner
Regardless of whether you are using Amazon Seller or Vendor Central, use this connector.
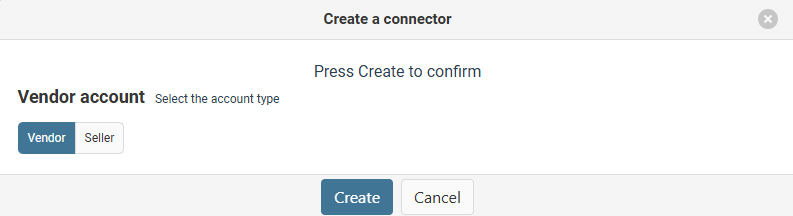
3. Choose between Amazon Selling Central and Amazon Vendor Central account
When you have chosen the correct option based on your account, click "Create".
4. Choose Region and click Authorize
Choose correct region.
In case you have Seller account, Merchant ID field will be visible for you. This field will be auto-populated once you run Authorization, so you don't need to worry about it.
After you click Authorize, Log in to your Amazon Selling Partner account and click Allow to grant access. Once you have finished, you will be redirected back to connector form.
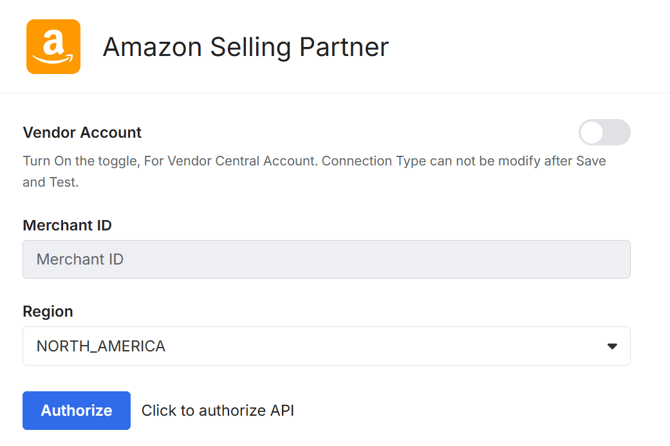
Keep Historical Sync Time Frame field as "Sync all historical data".
7. Click "Save & Test" and you are forwarded back to Sellforte
You are ready! 🎉
Amazon Selling or Vendor Partner is connected and data is fetched automatically with correct schema to Sellforte.